Very important! Demo API keys are created in the DEMO Trading section on the Bybit exchange, and they are different from the API keys for real trading. When demo trading is enabled in the bot, the API keys must be demo keys!

ByBit Subaccount Creation
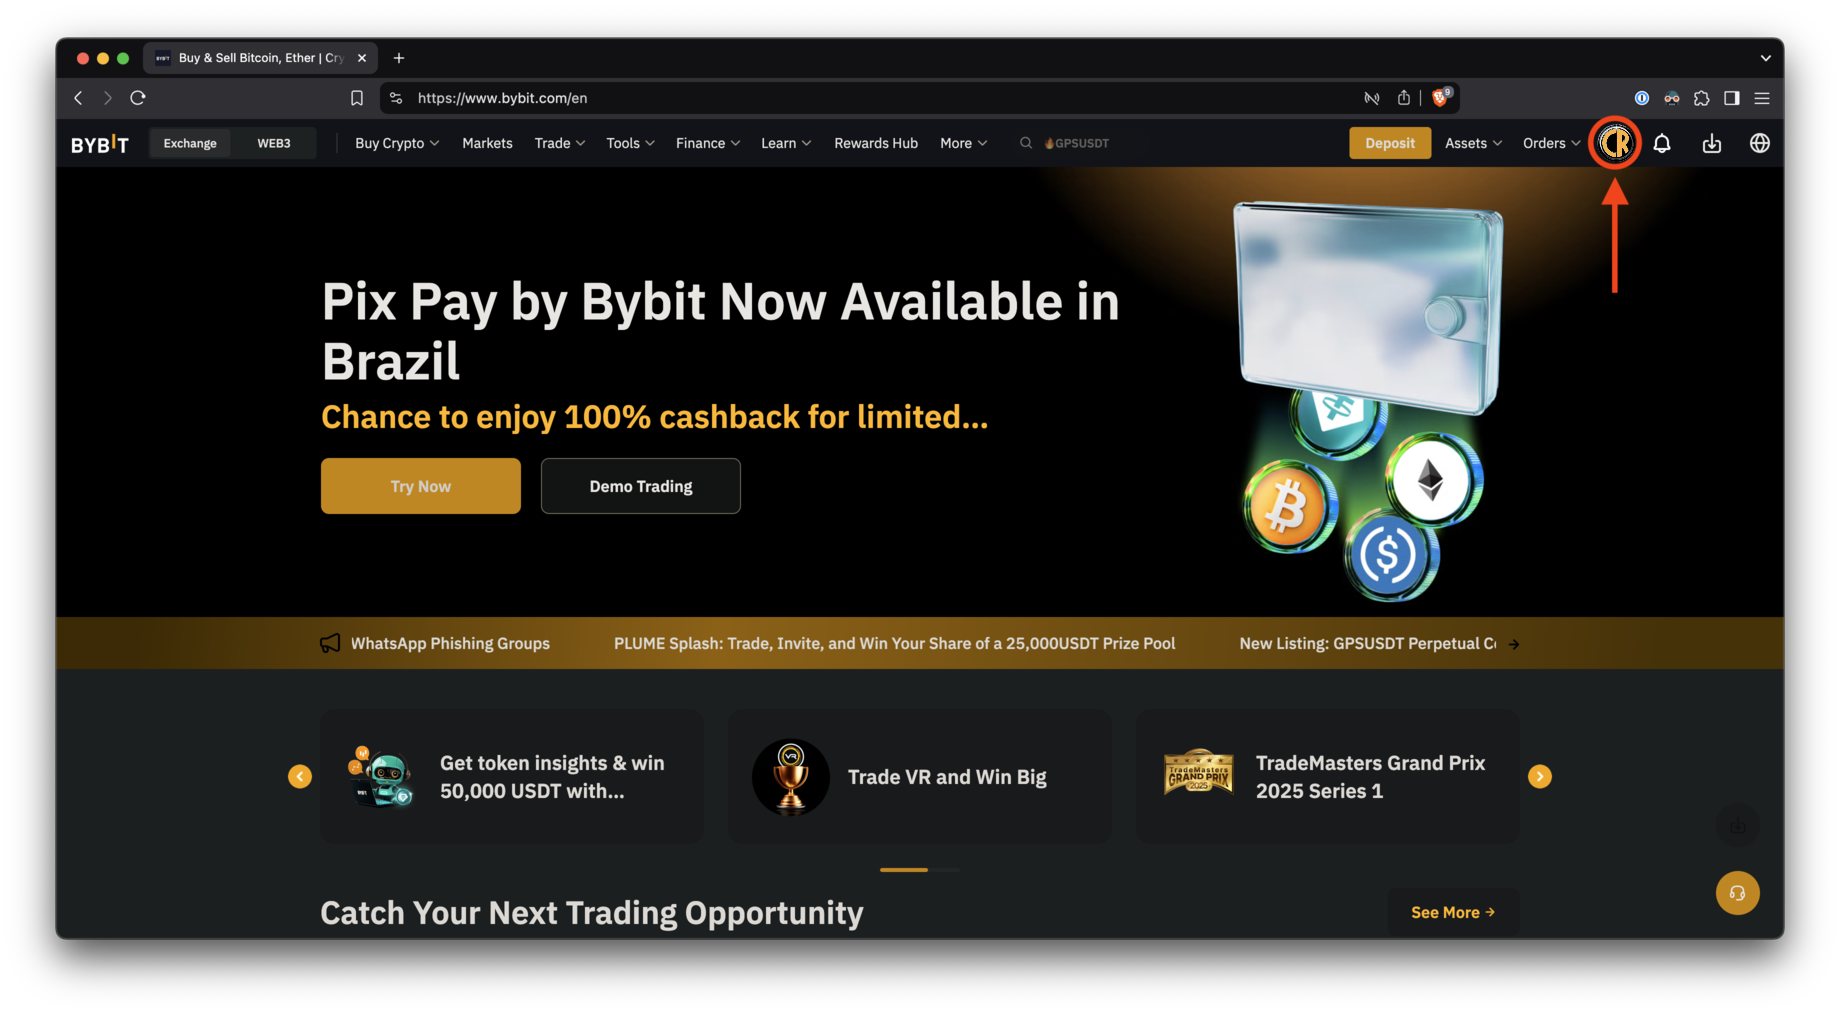
Step 1
Click on the profile picture to open the account menu.
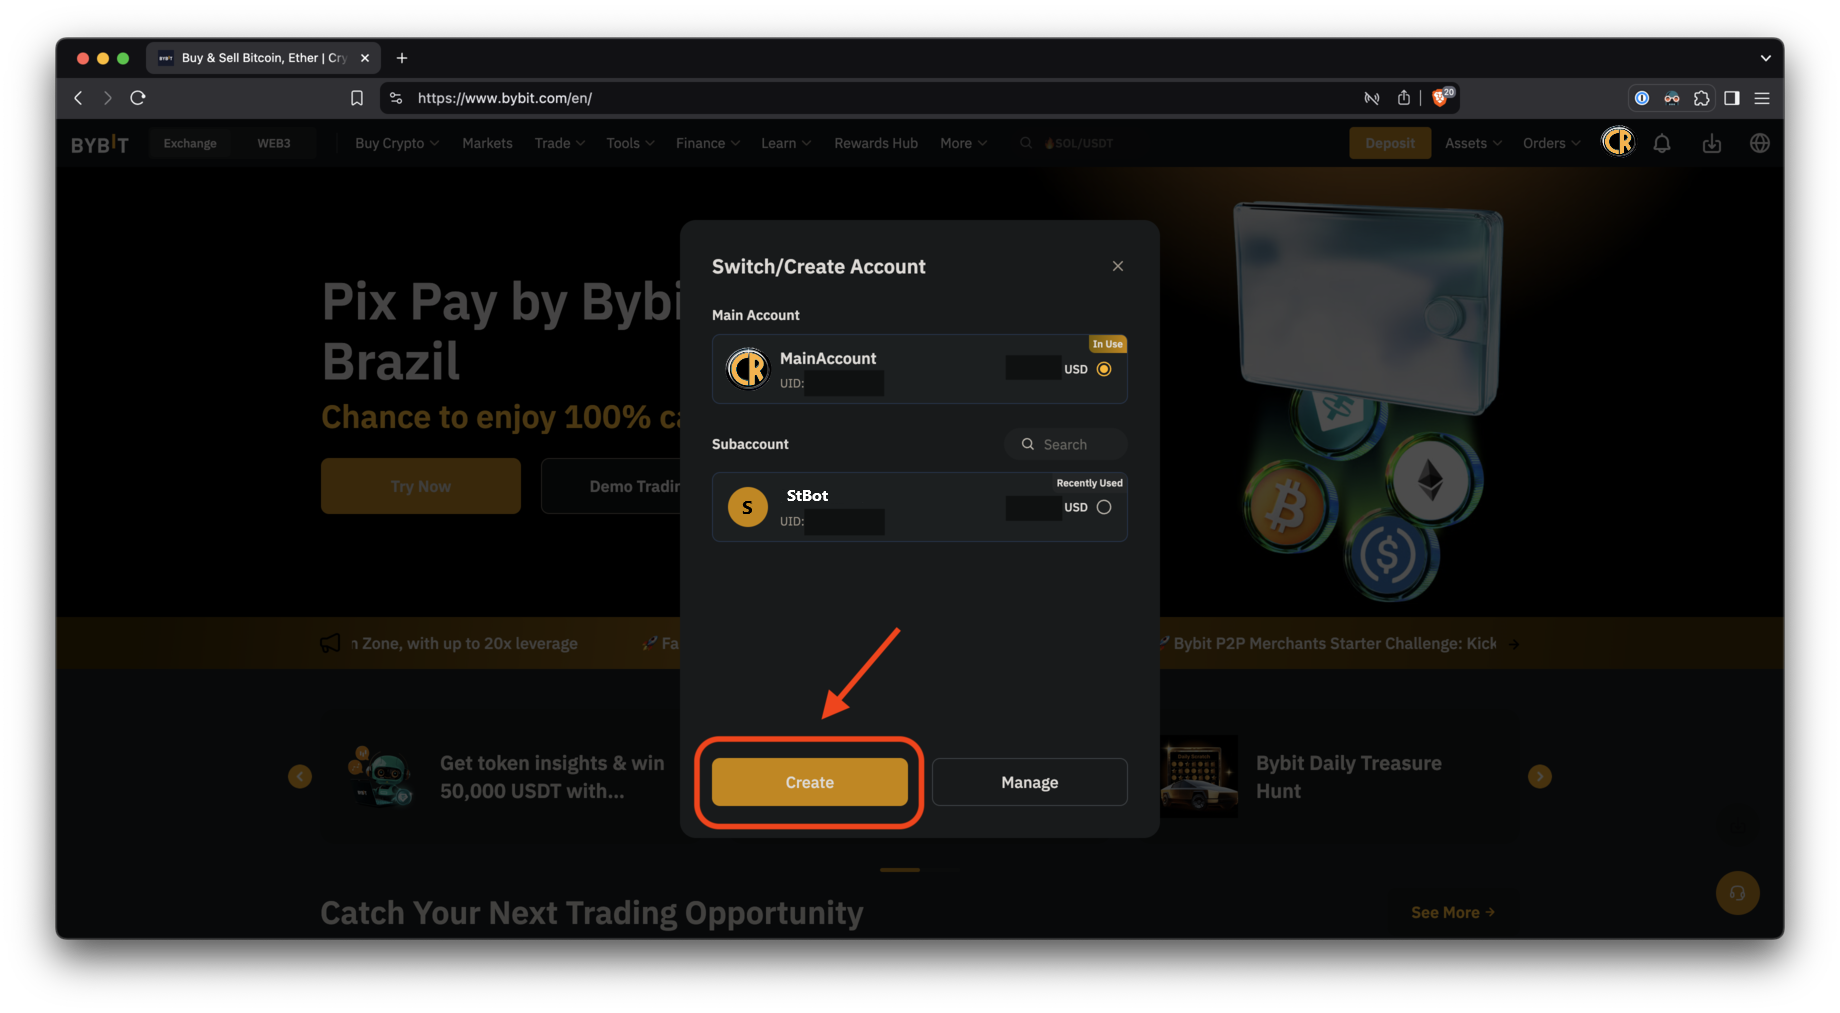
Step 2
Click the “Switch/Create Account” button to see the sub-accounts.

Step 3
Click the “Create” button to add a new sub-account.
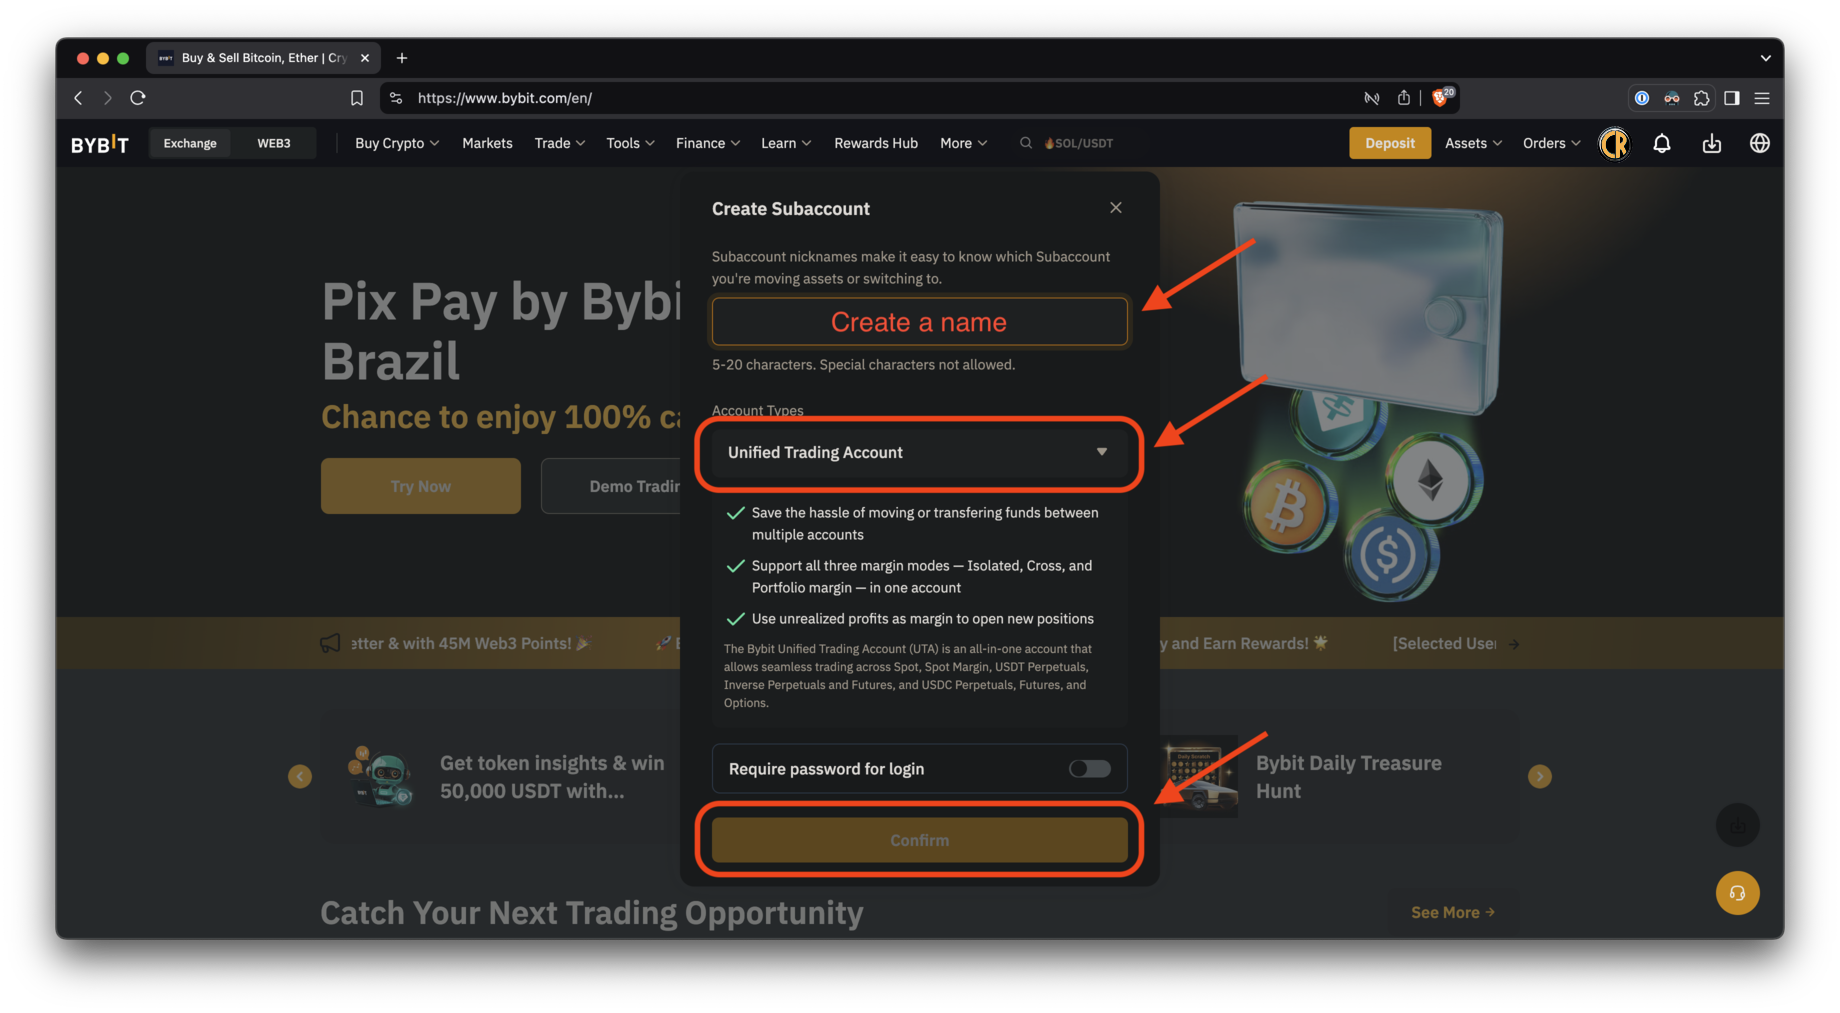
Step 4
- Enter a memorable name, such as the configuration name of your bot;
- Leave the account type set to “Single Trading Account”;
- Then click the “Confirm” button to finalize the creation of the sub-account.
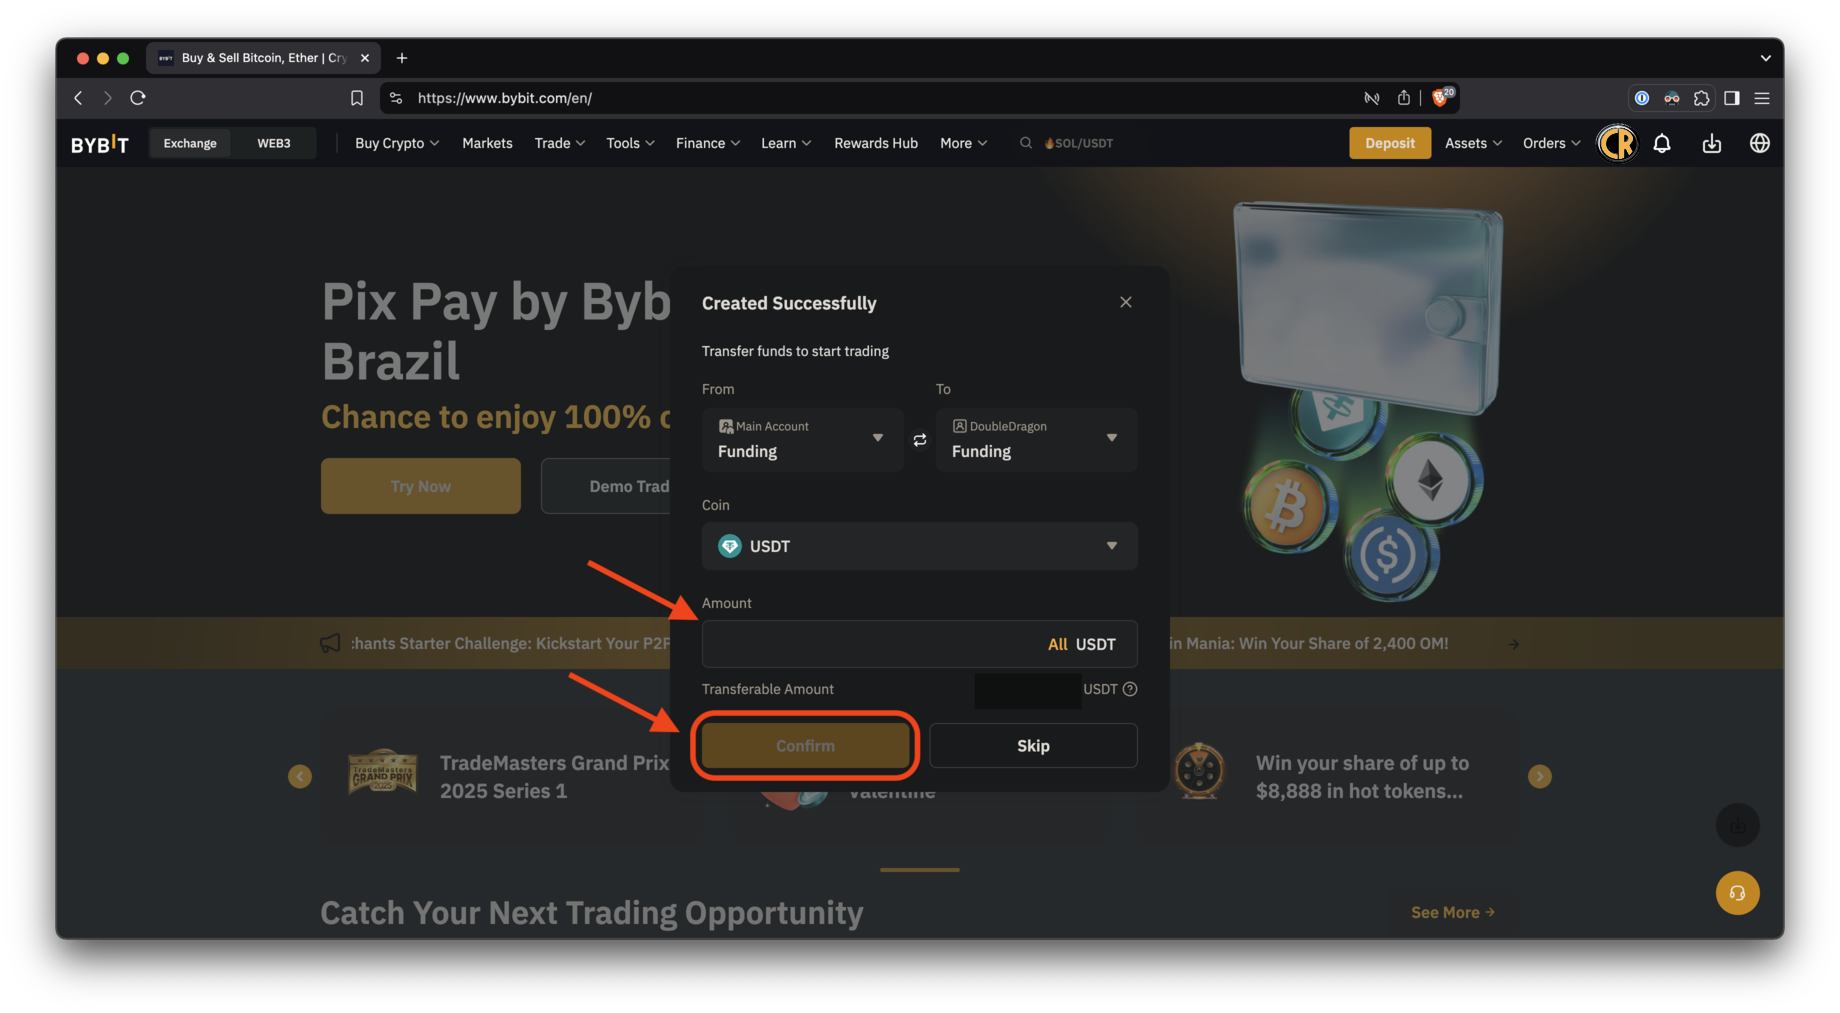
Step 5
- At this point you can transfer funds to the sub-account.
- Or click the “Skip” button if you want to do it later.
- ATTENTION: funds on the Unified Trading Account are required for the bot to work!
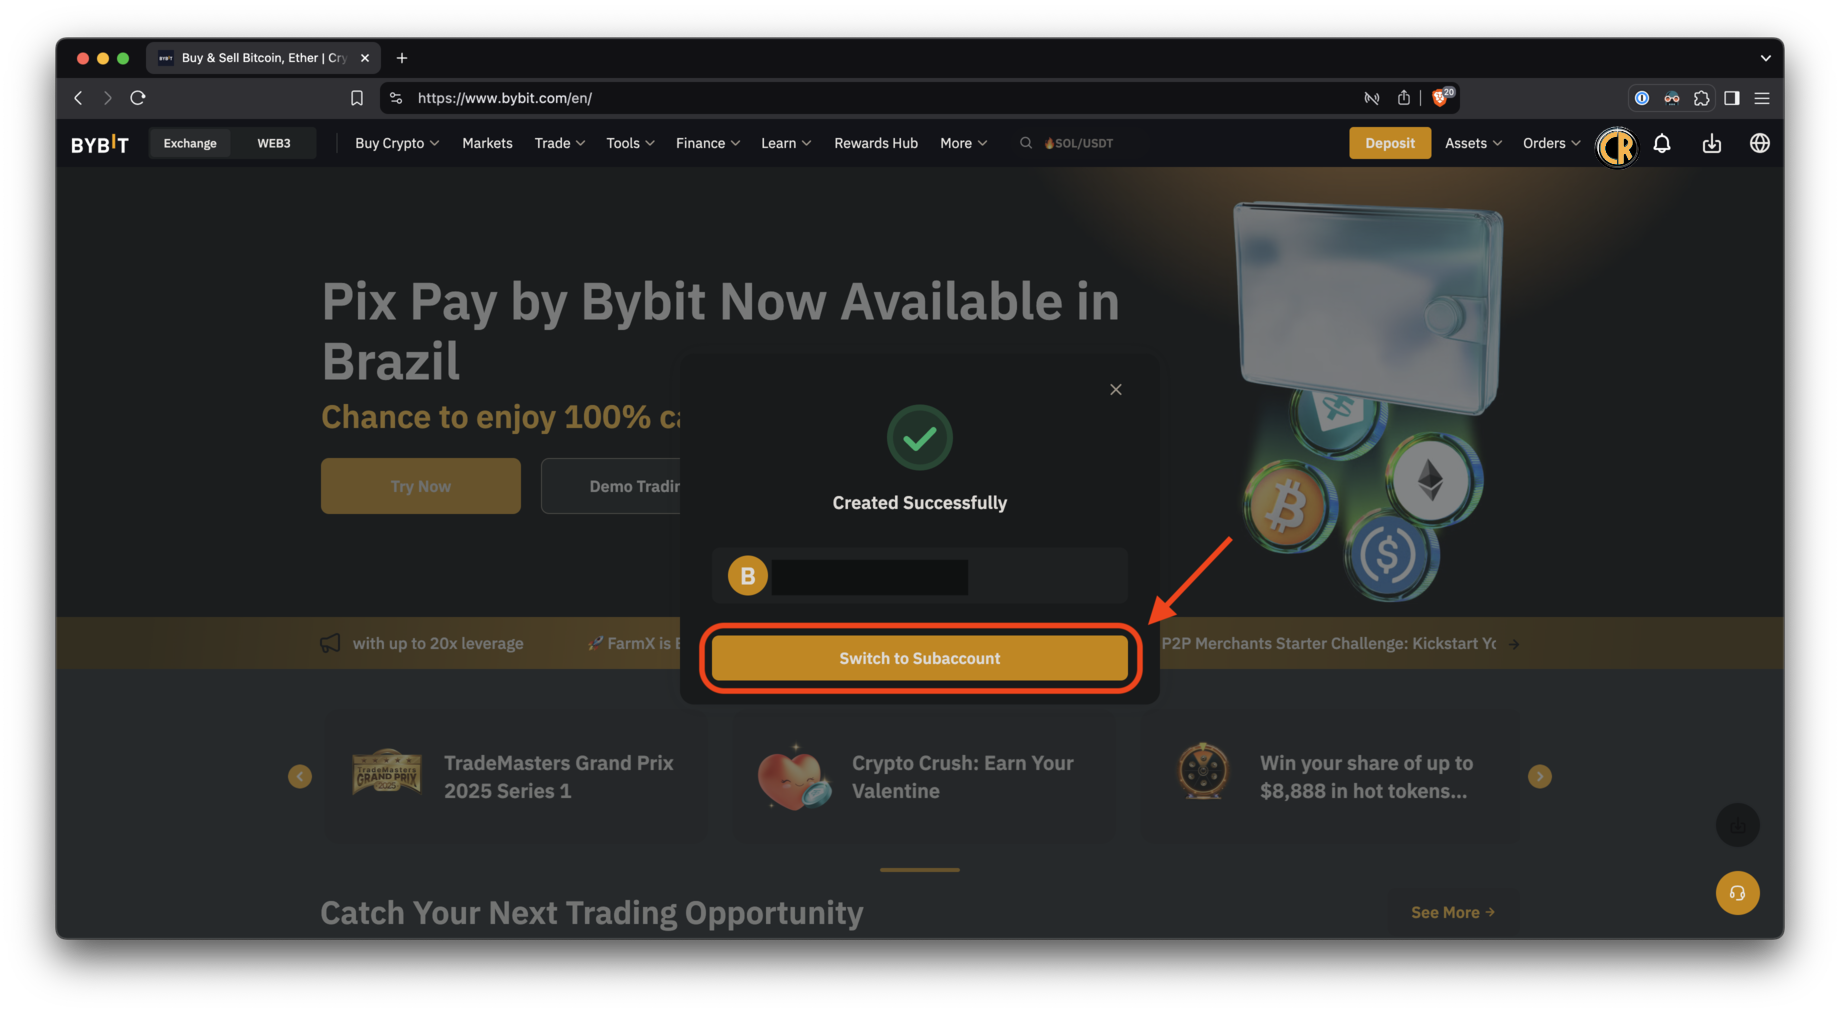
 Step 6
Switch to the created subaccount.
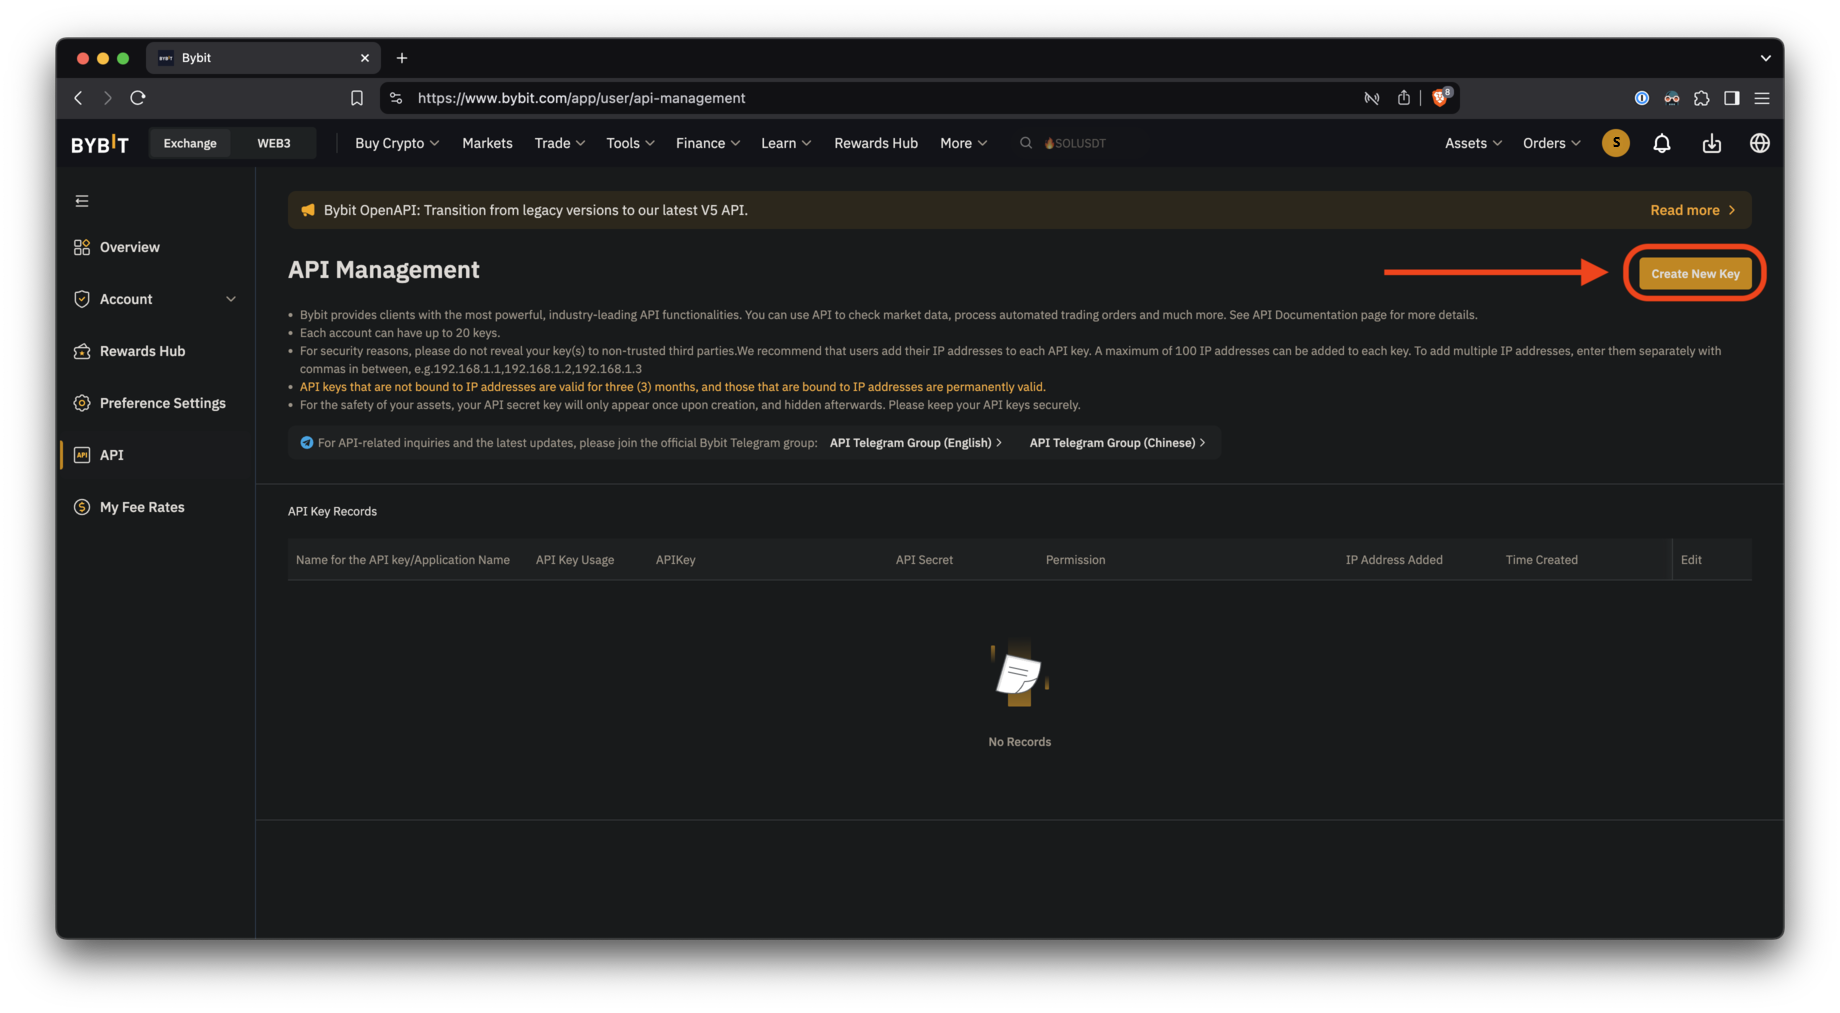
API key generation
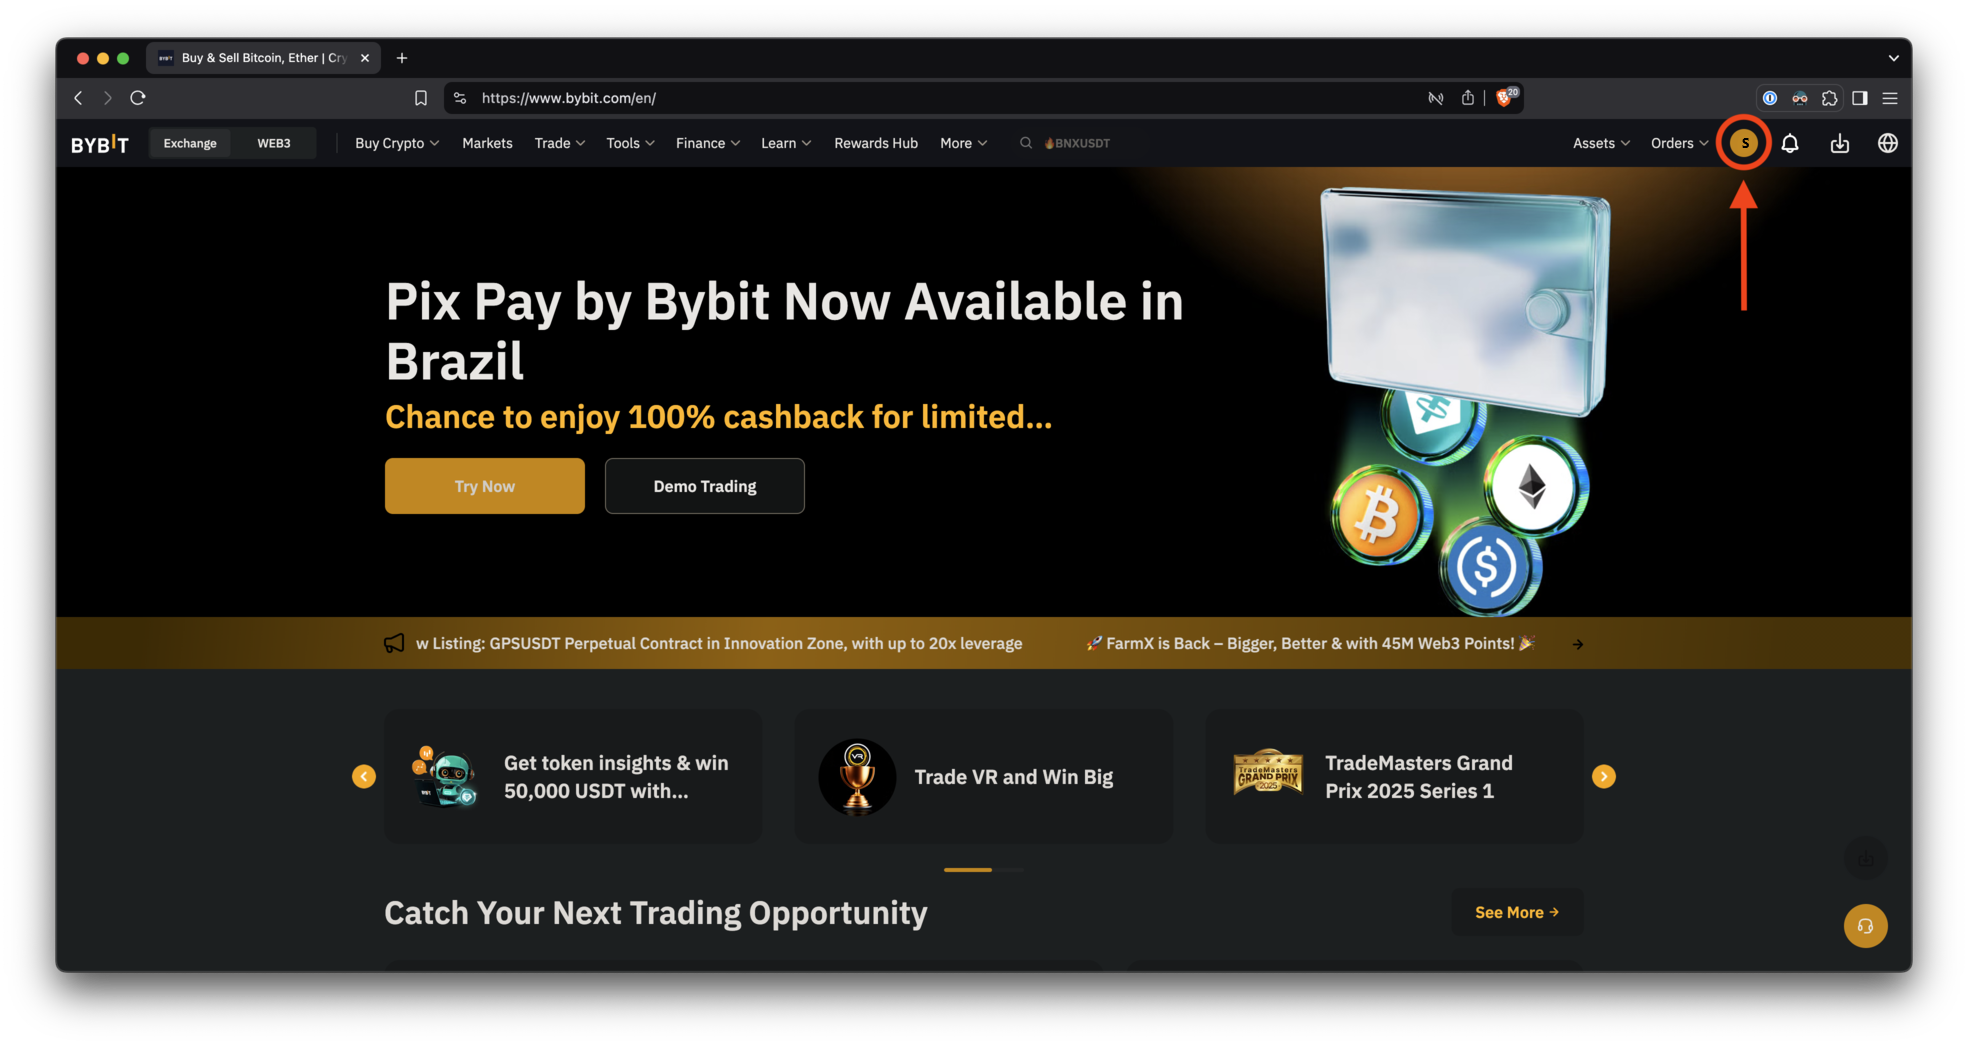
Step 1
Click on the profile picture to display the account menu.
Make sure you are logged in to the newly created subaccount.
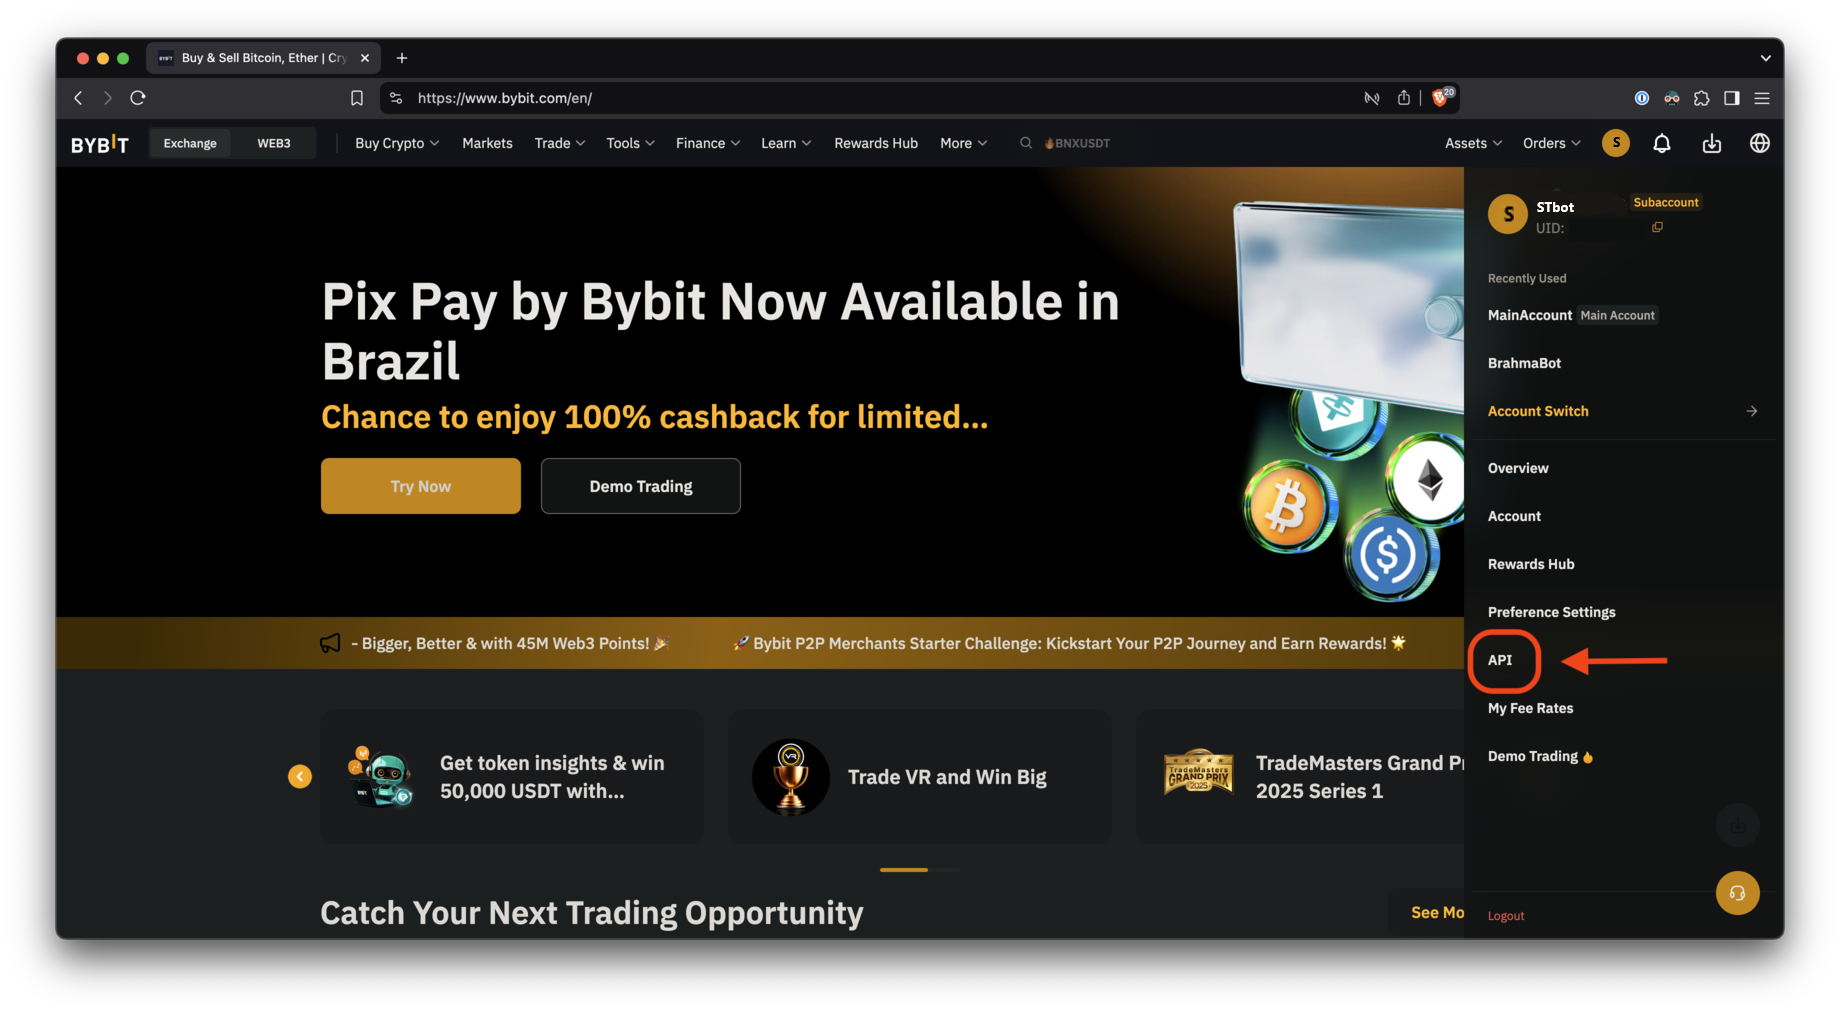
Step 2
Select the API link to open the API key creation page.
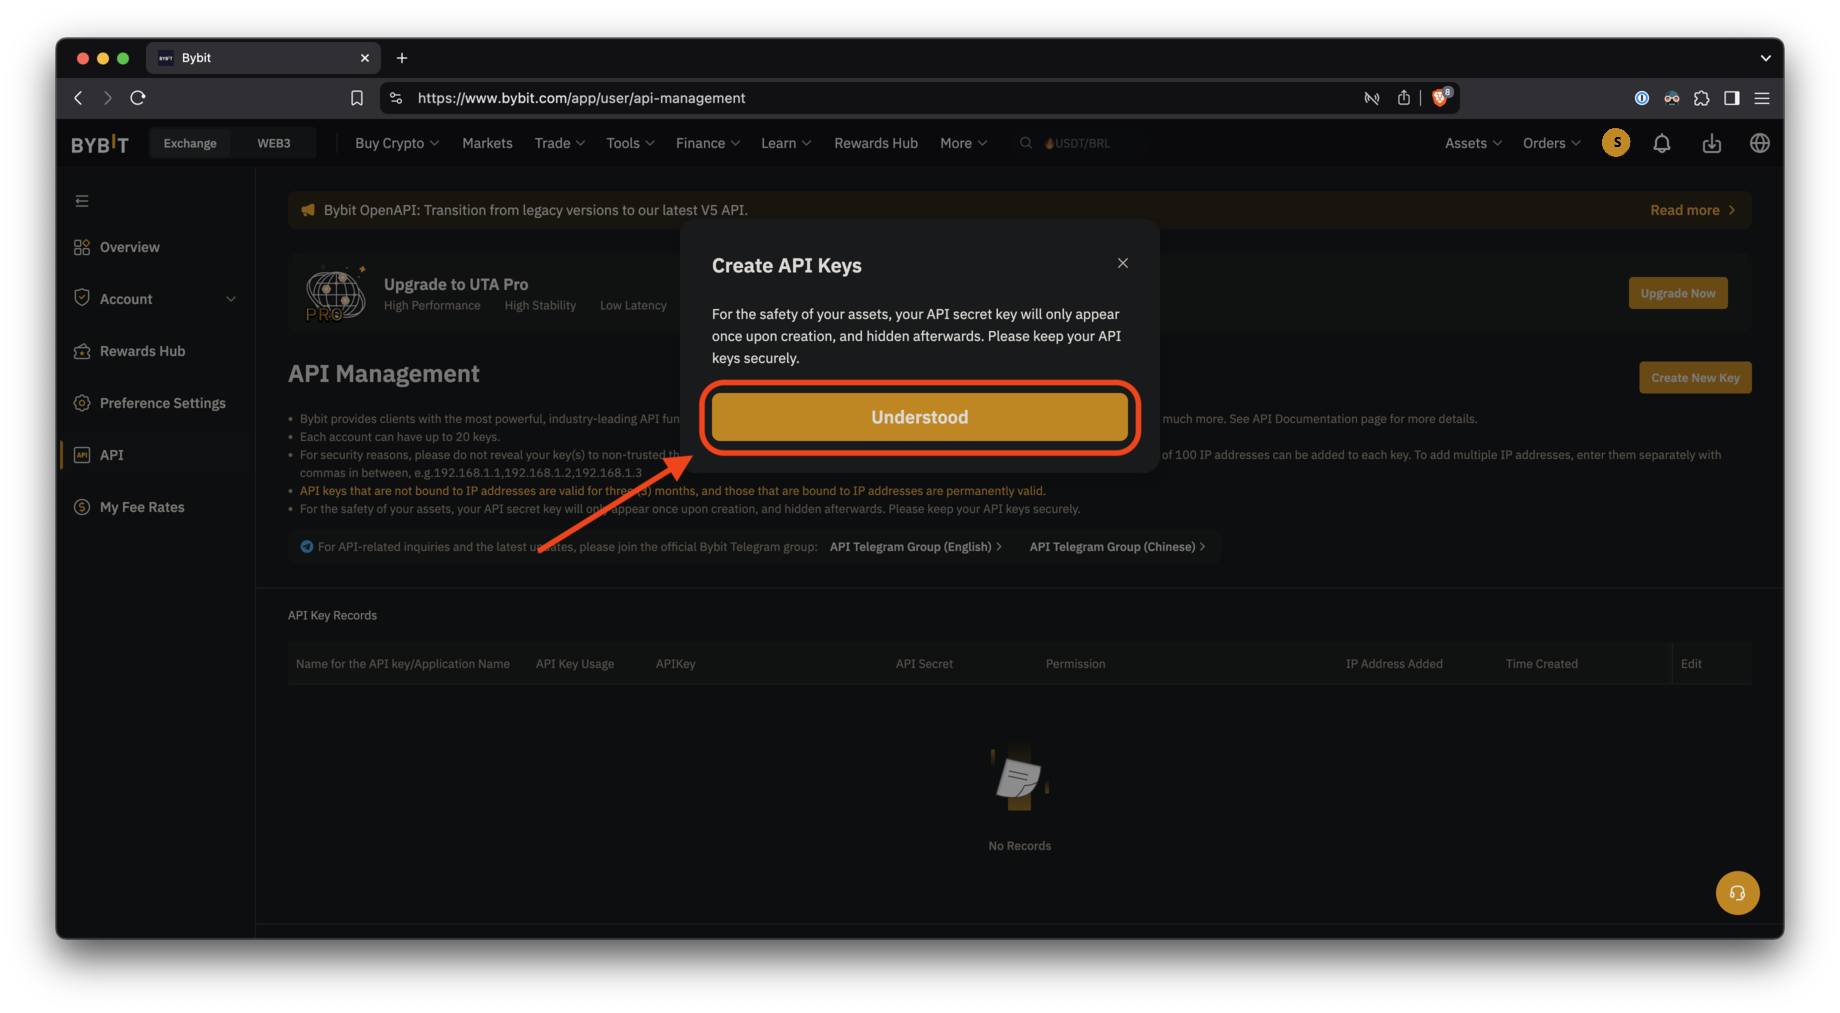
Step 3
Read the warning and click “Understand”.
Step 4
Click “Create a new key.”
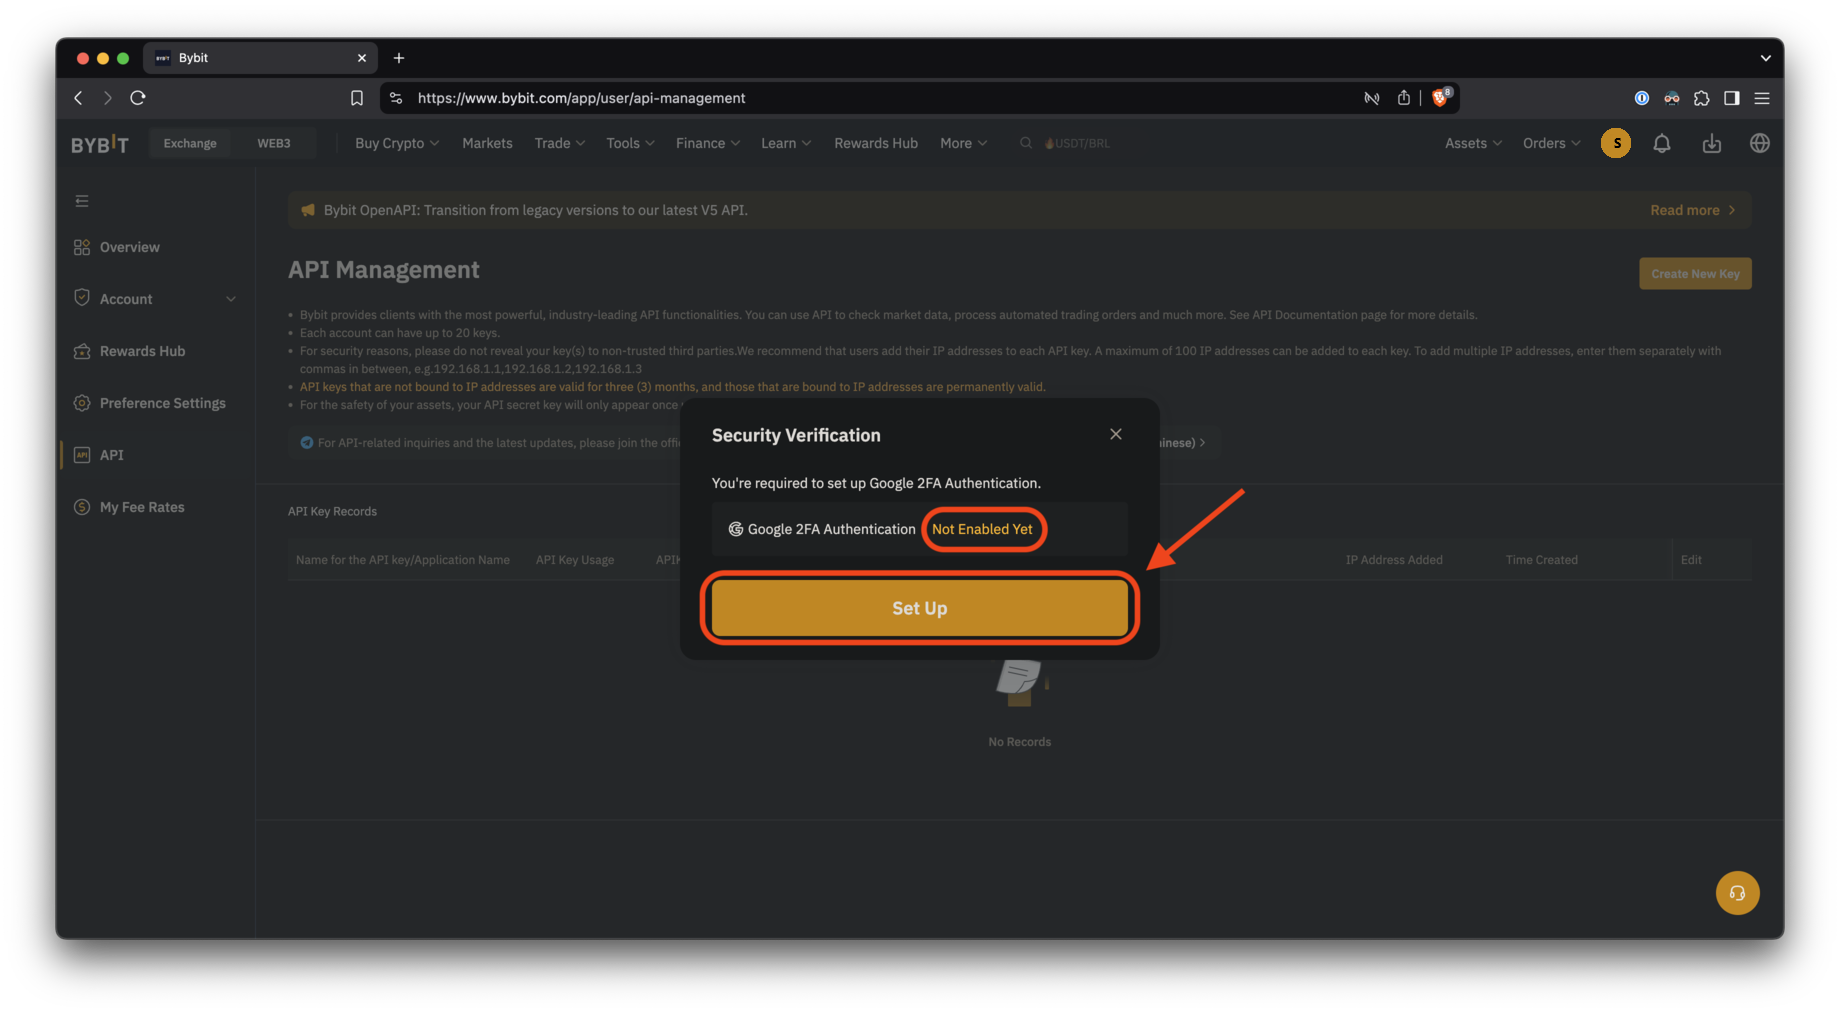
Step 5
- If you have not set up 2FA, Bybit will ask you to do so before proceeding.
- The warning will say “Not yet enabled”.
- Click “Customize” to go to the security page and customize it.
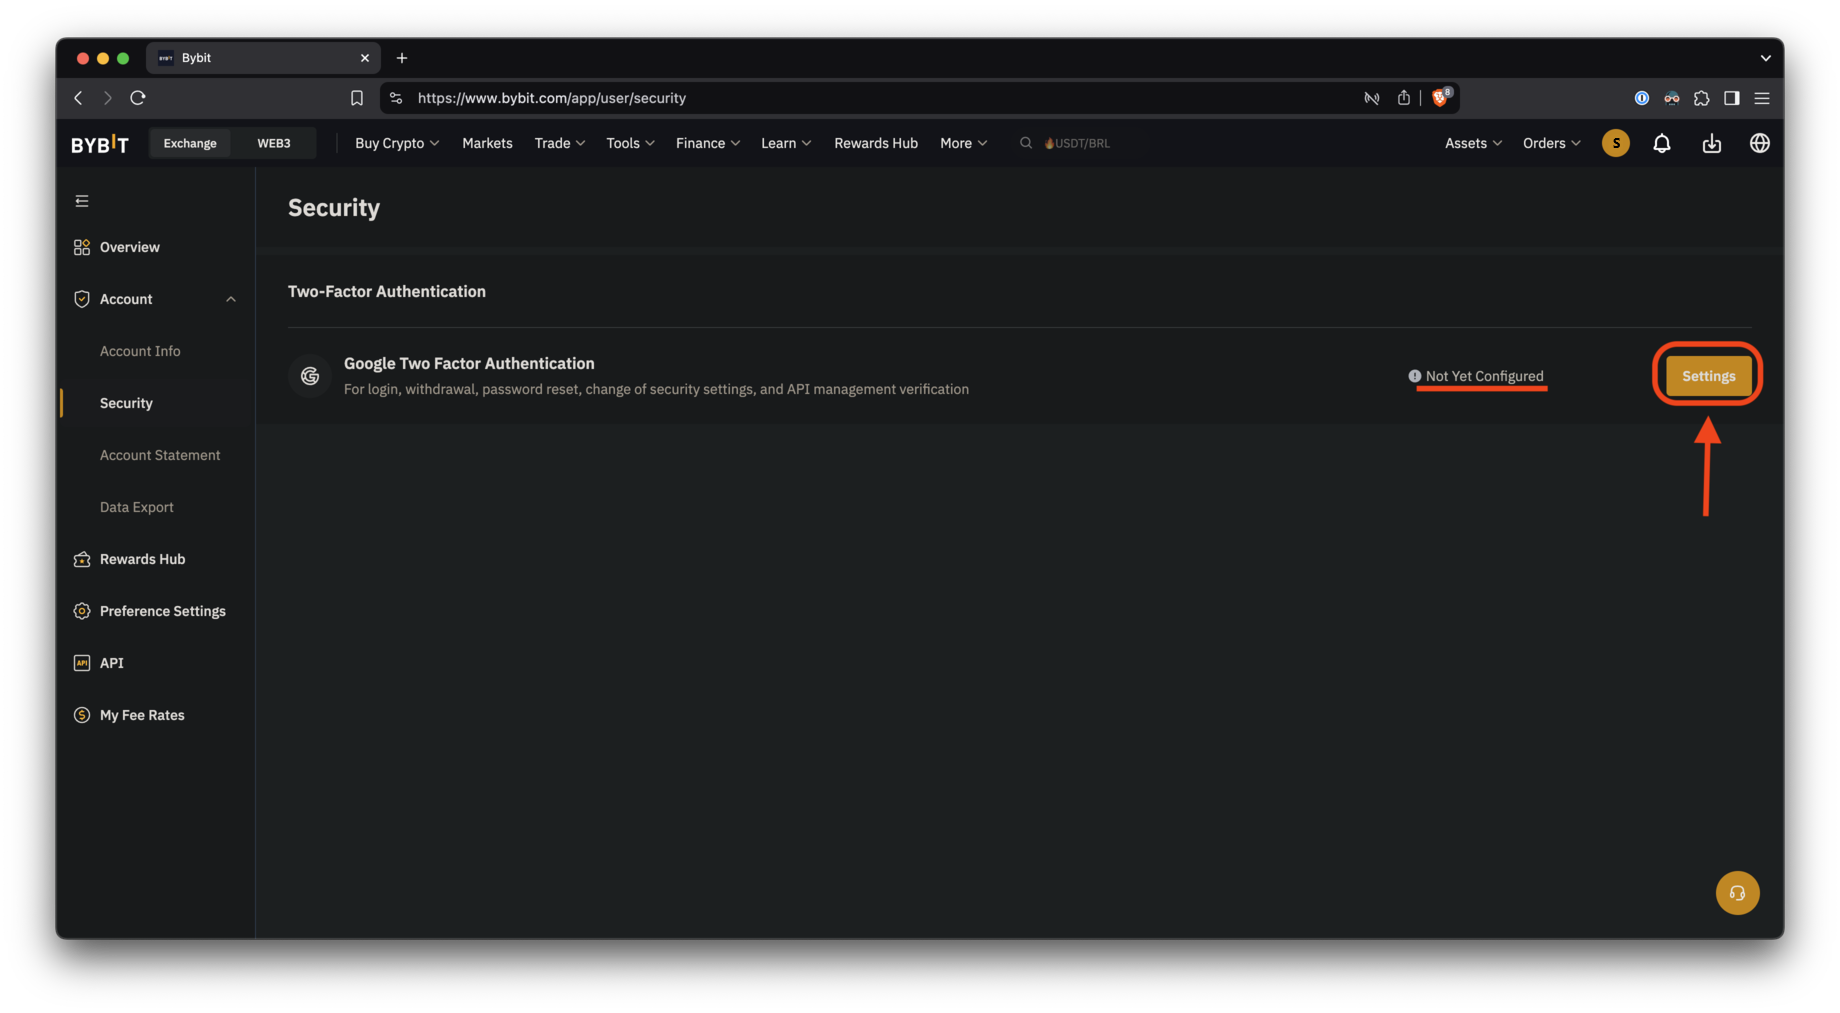
Step 6
- Click “Settings” to configure 2FA.
- This manual does not cover the 2FA setup.
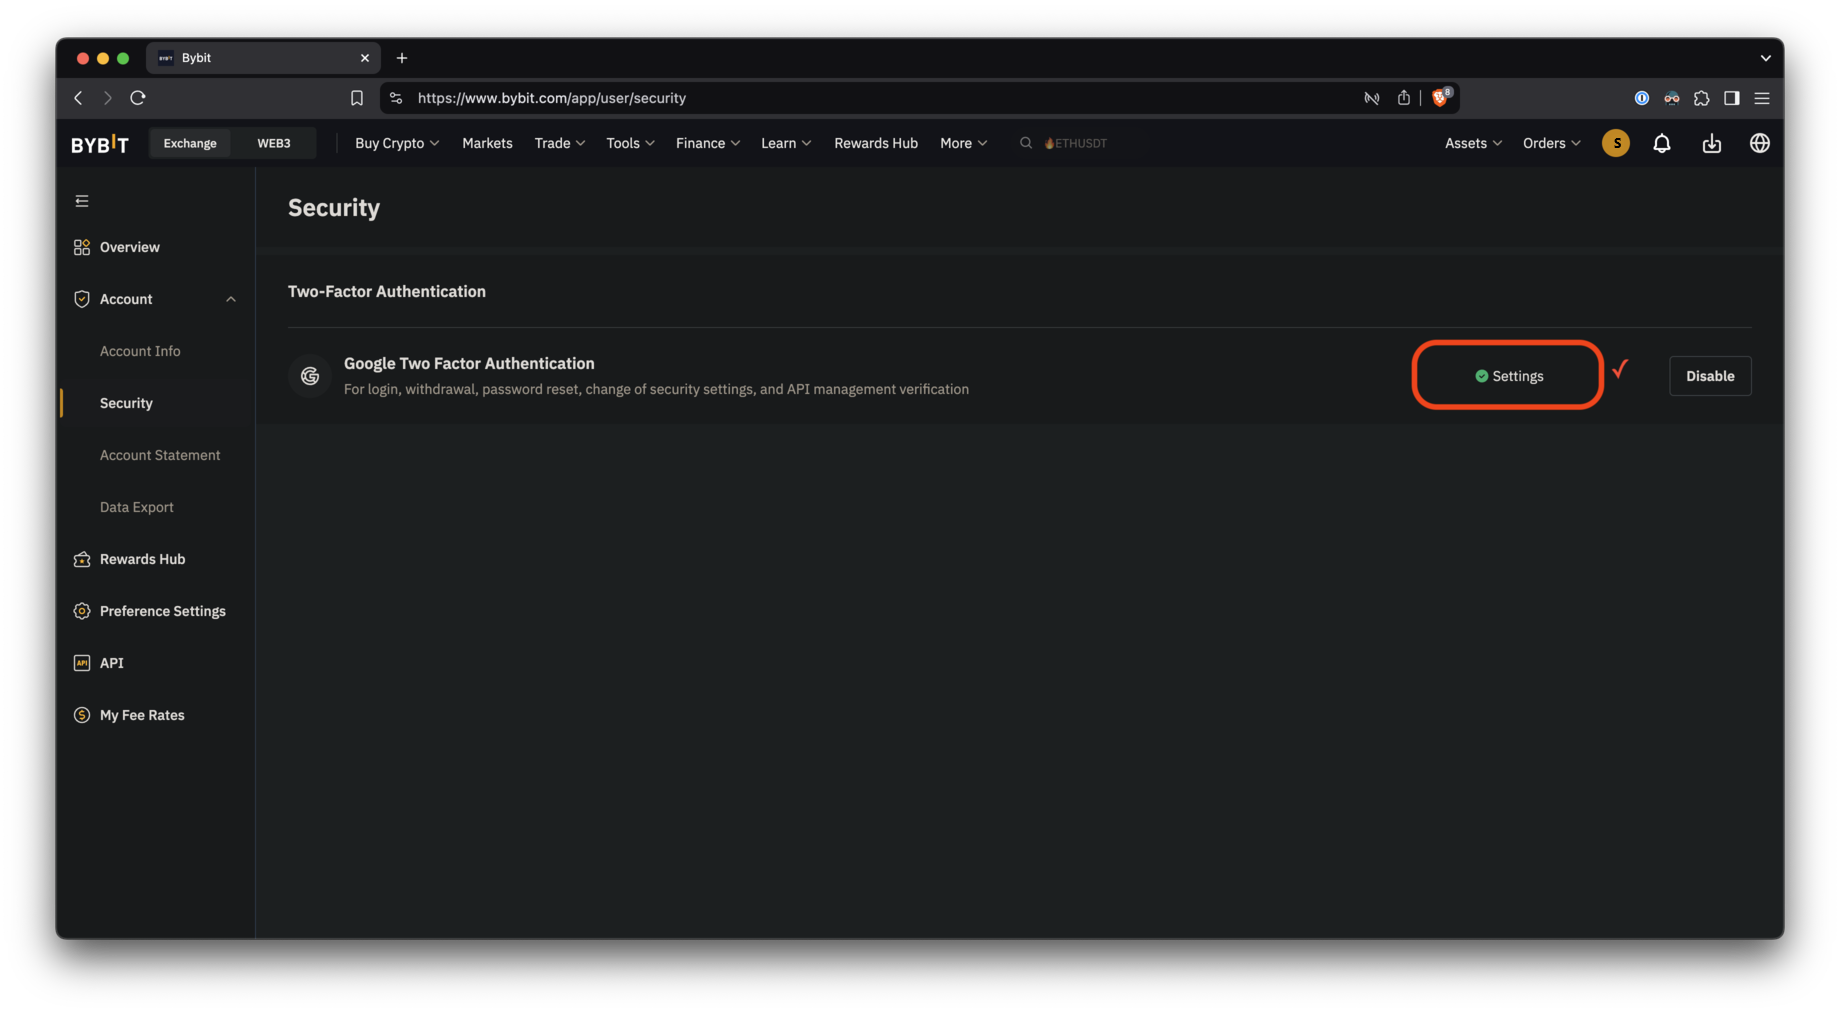
Step 7
If you see a green check mark, the setup is complete.
Step 8
Now go back to the API creation page from step 4 and click “Create a new key”.

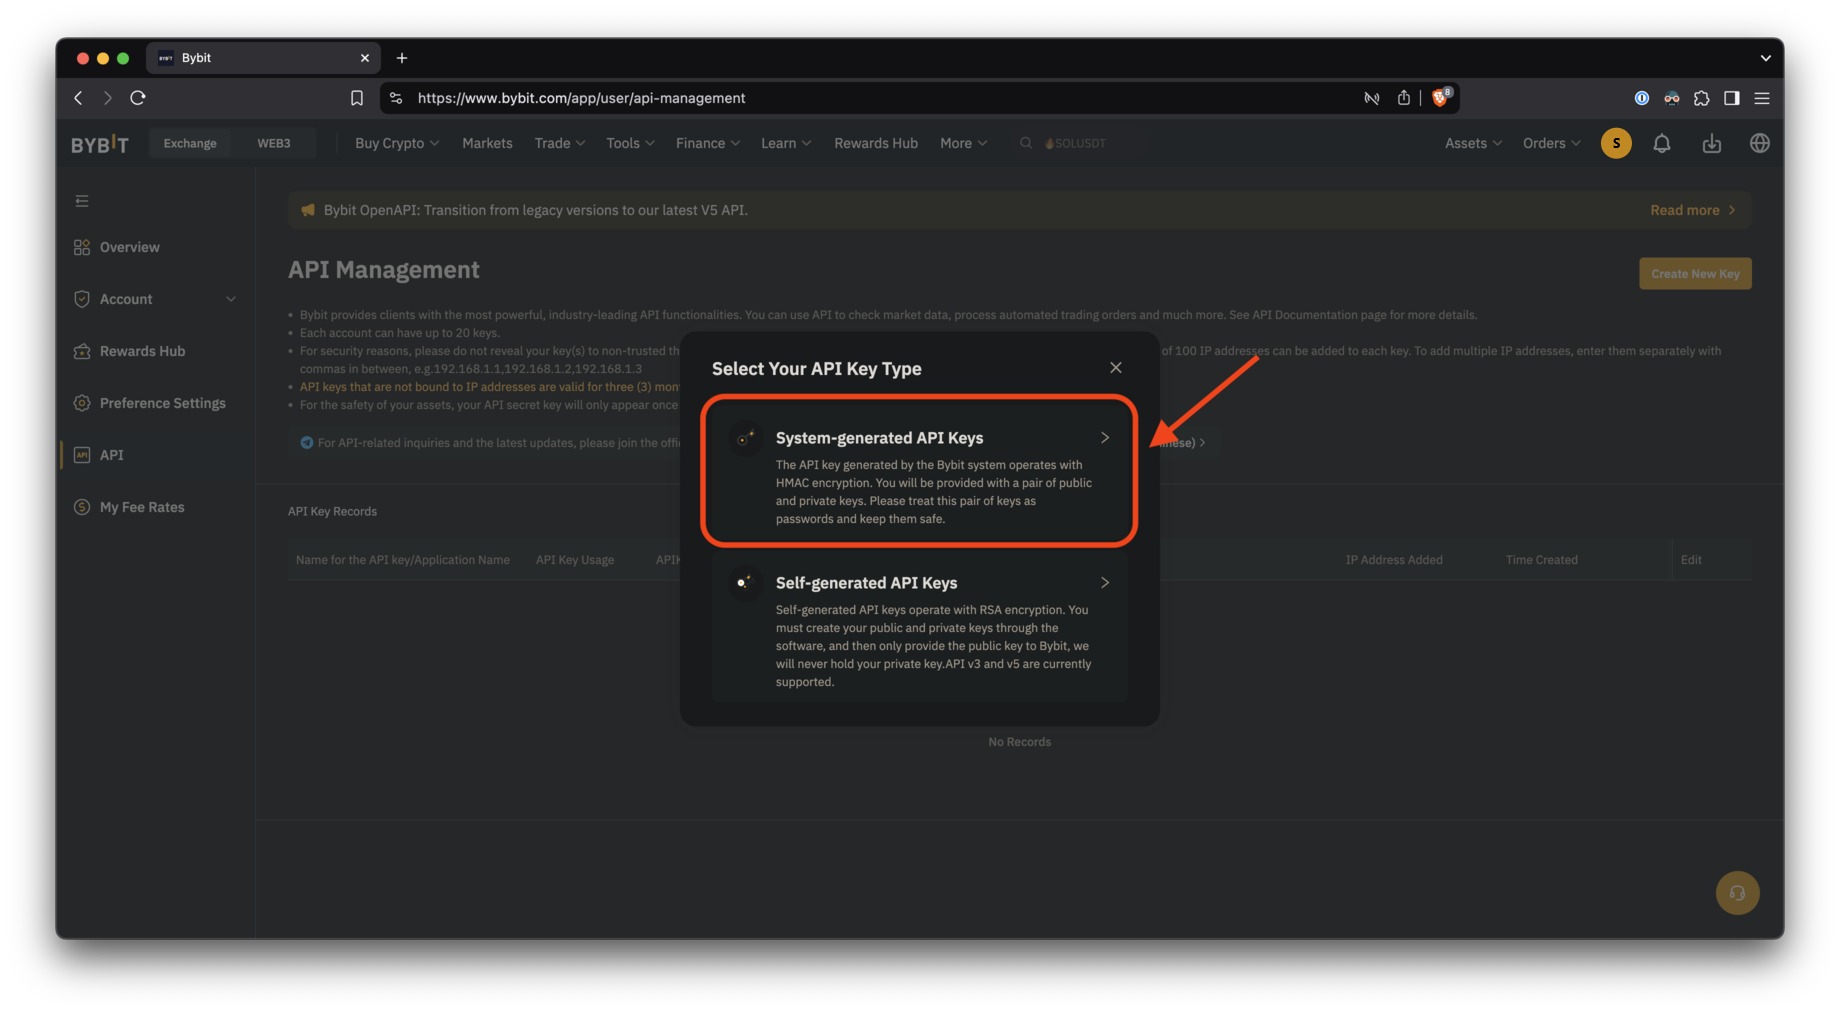
Step 9
Select the first option, “System-generated API keys”.
Step 10
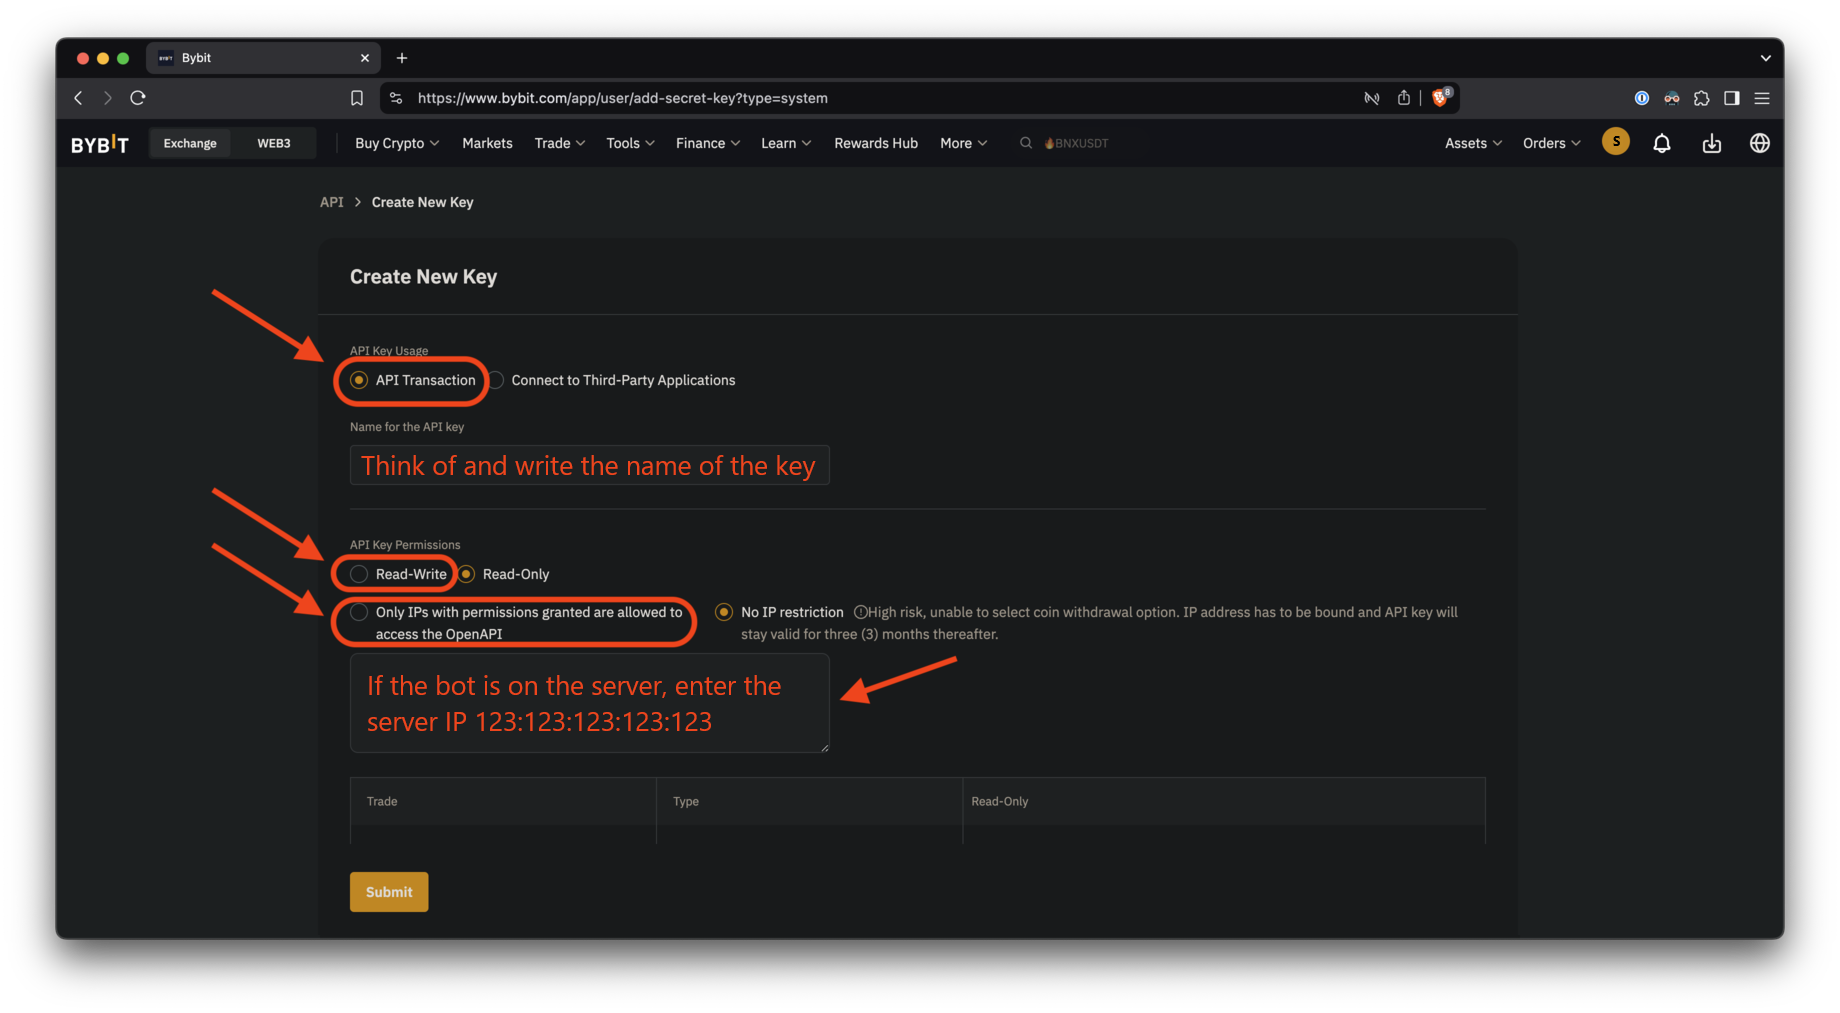
- First, select the “API transaction” option.
- Then enter a name, such as “ST-Bot” to indicate where the key is used.
- Next, select the “Read-Write” option so that the bot can open and close positions correctly.
- Next, select the “Access to OpenAPI is only allowed to IP addresses with granted permissions” option.
- Finally, enter the IP address of the server on which you intend to install the bot (if you install the bot on your PC, do not enter the IP, but take into account that the validity of API keys without binding to the IP address is 3 months).
Step 11
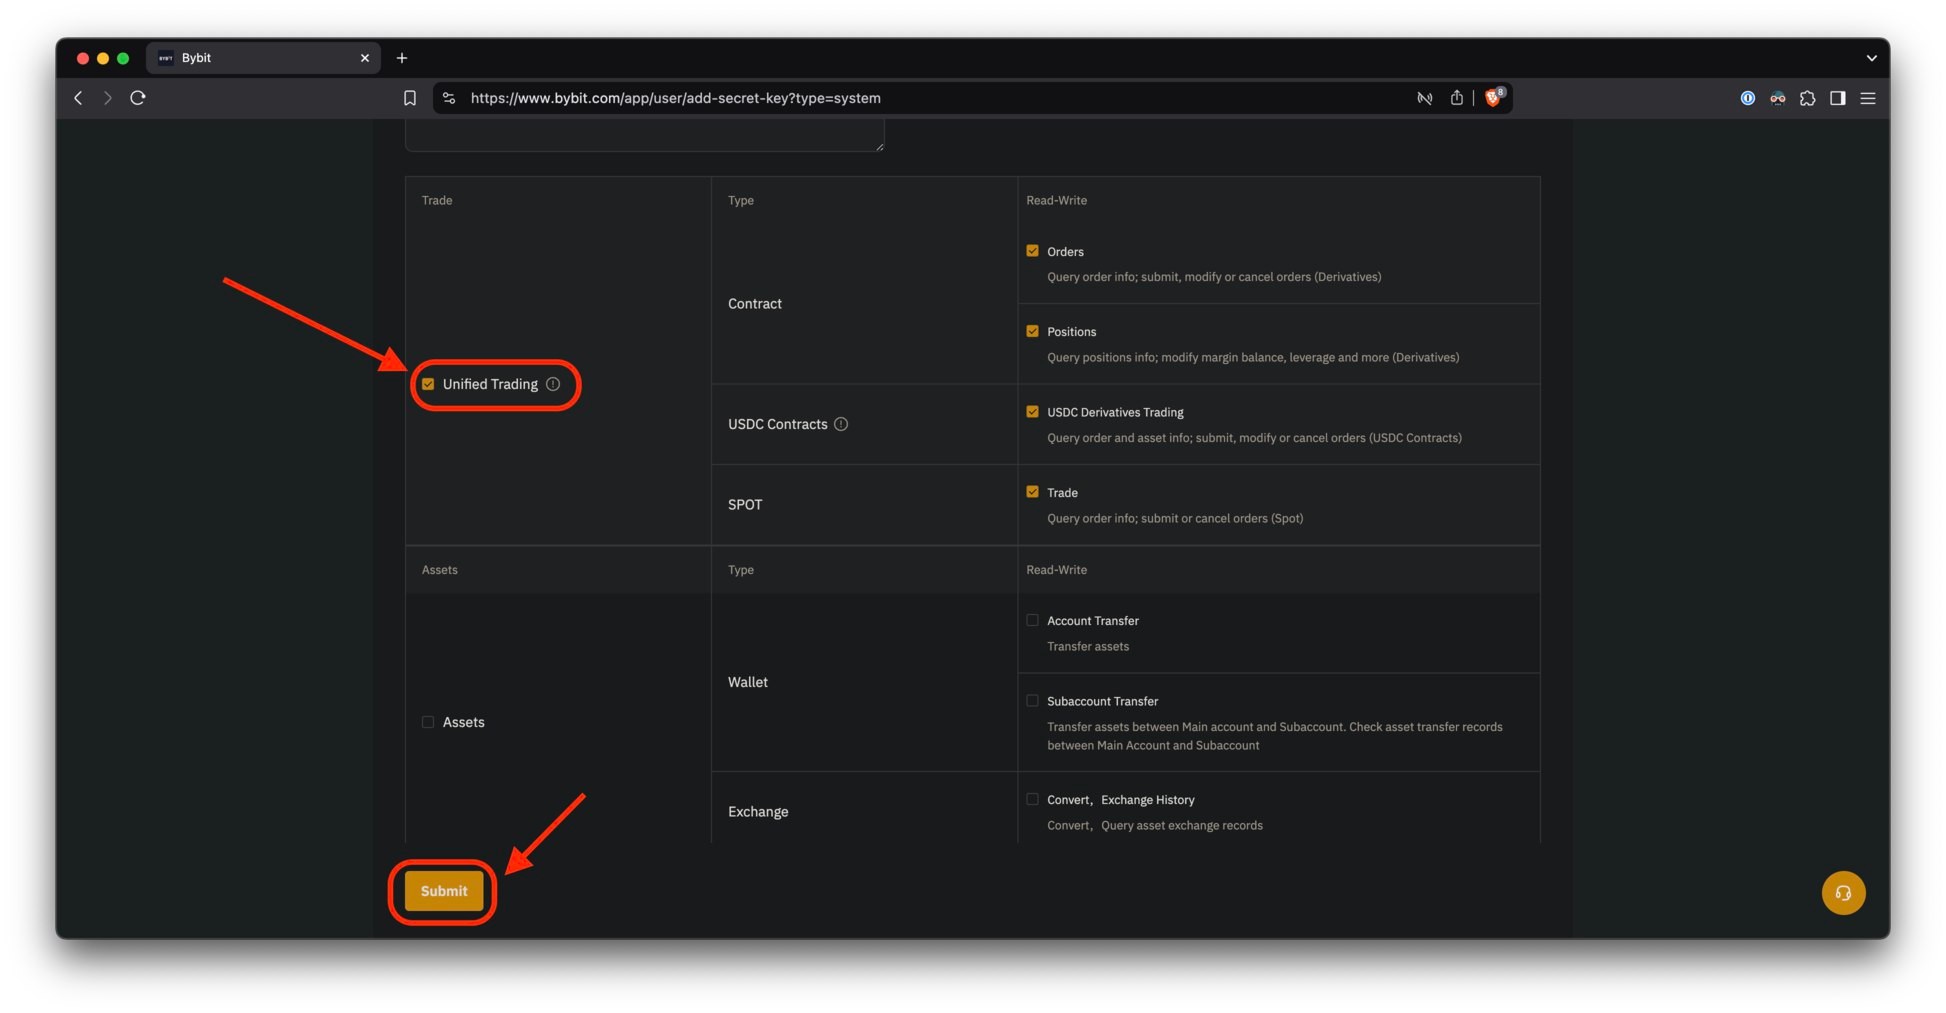
Check the “Unified Trading” box, then click “Submit”.
Step 12
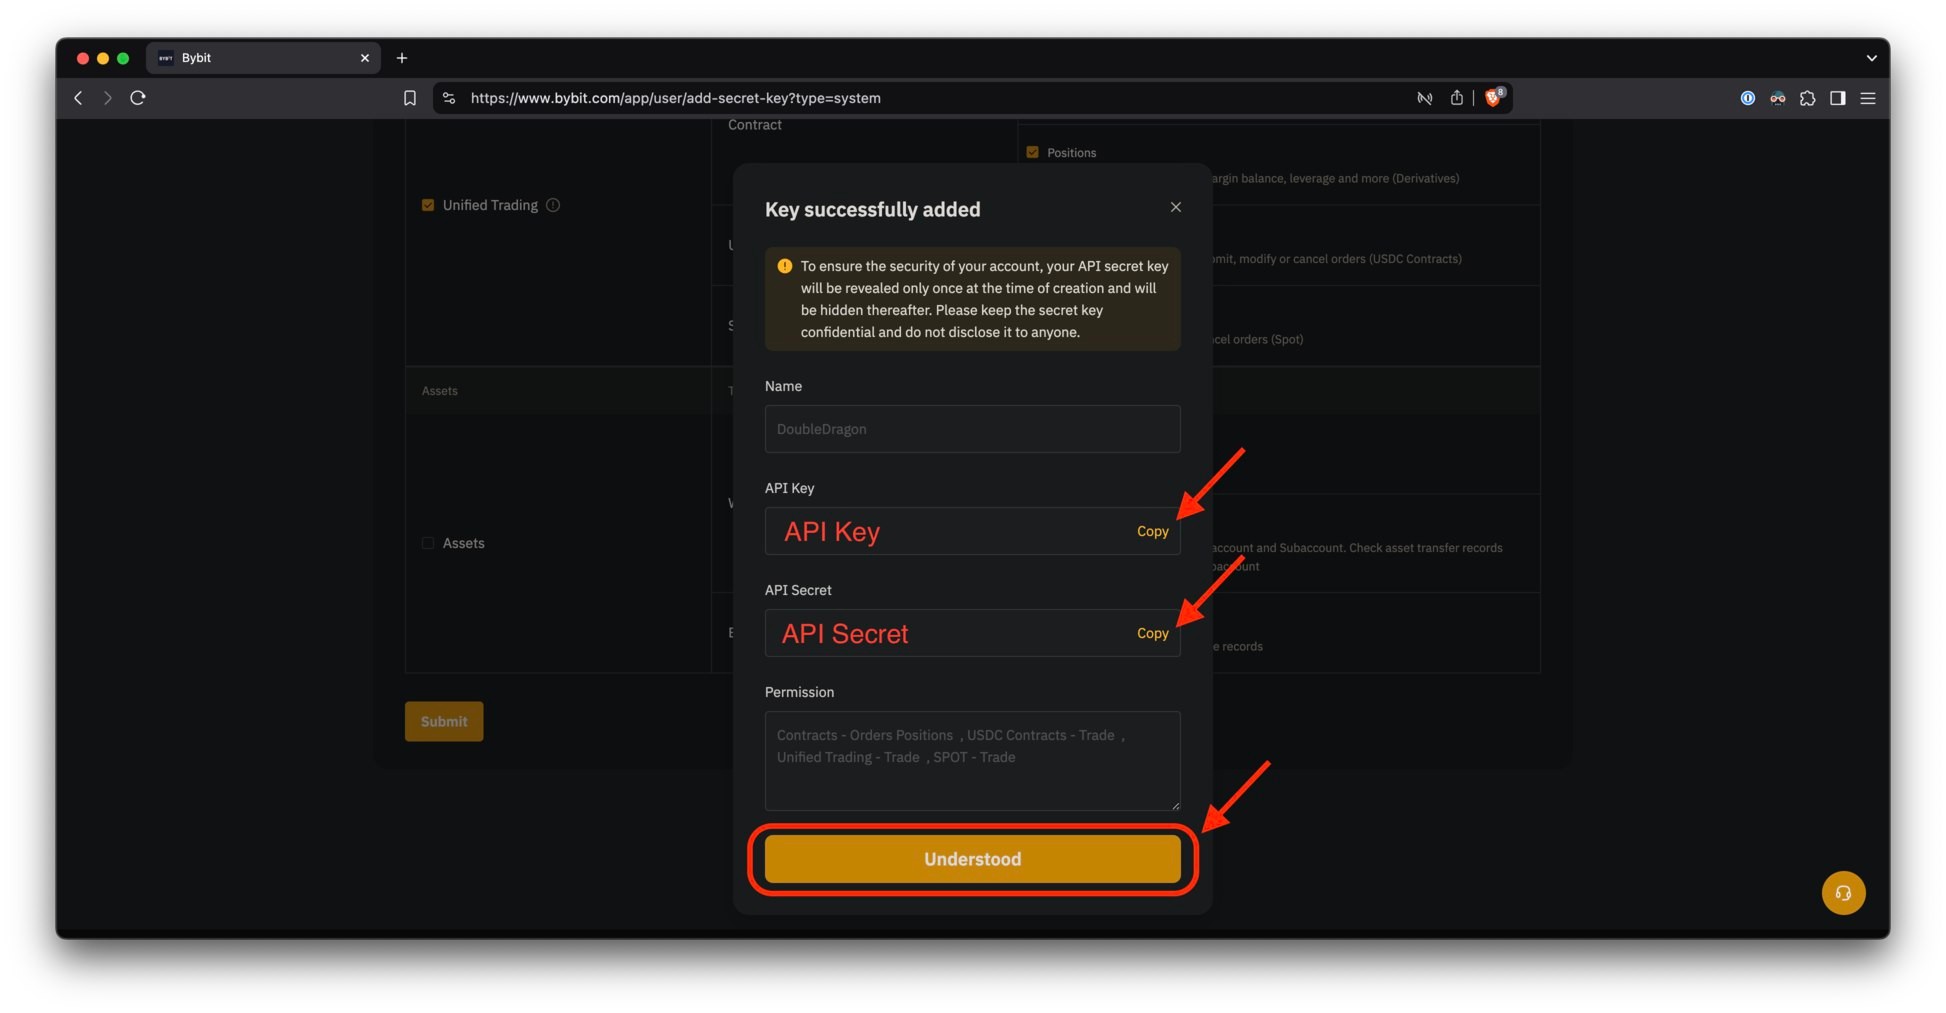
Now copy both API Key and API Secret and save them in a safe place - you'll need them soon.
Step 13
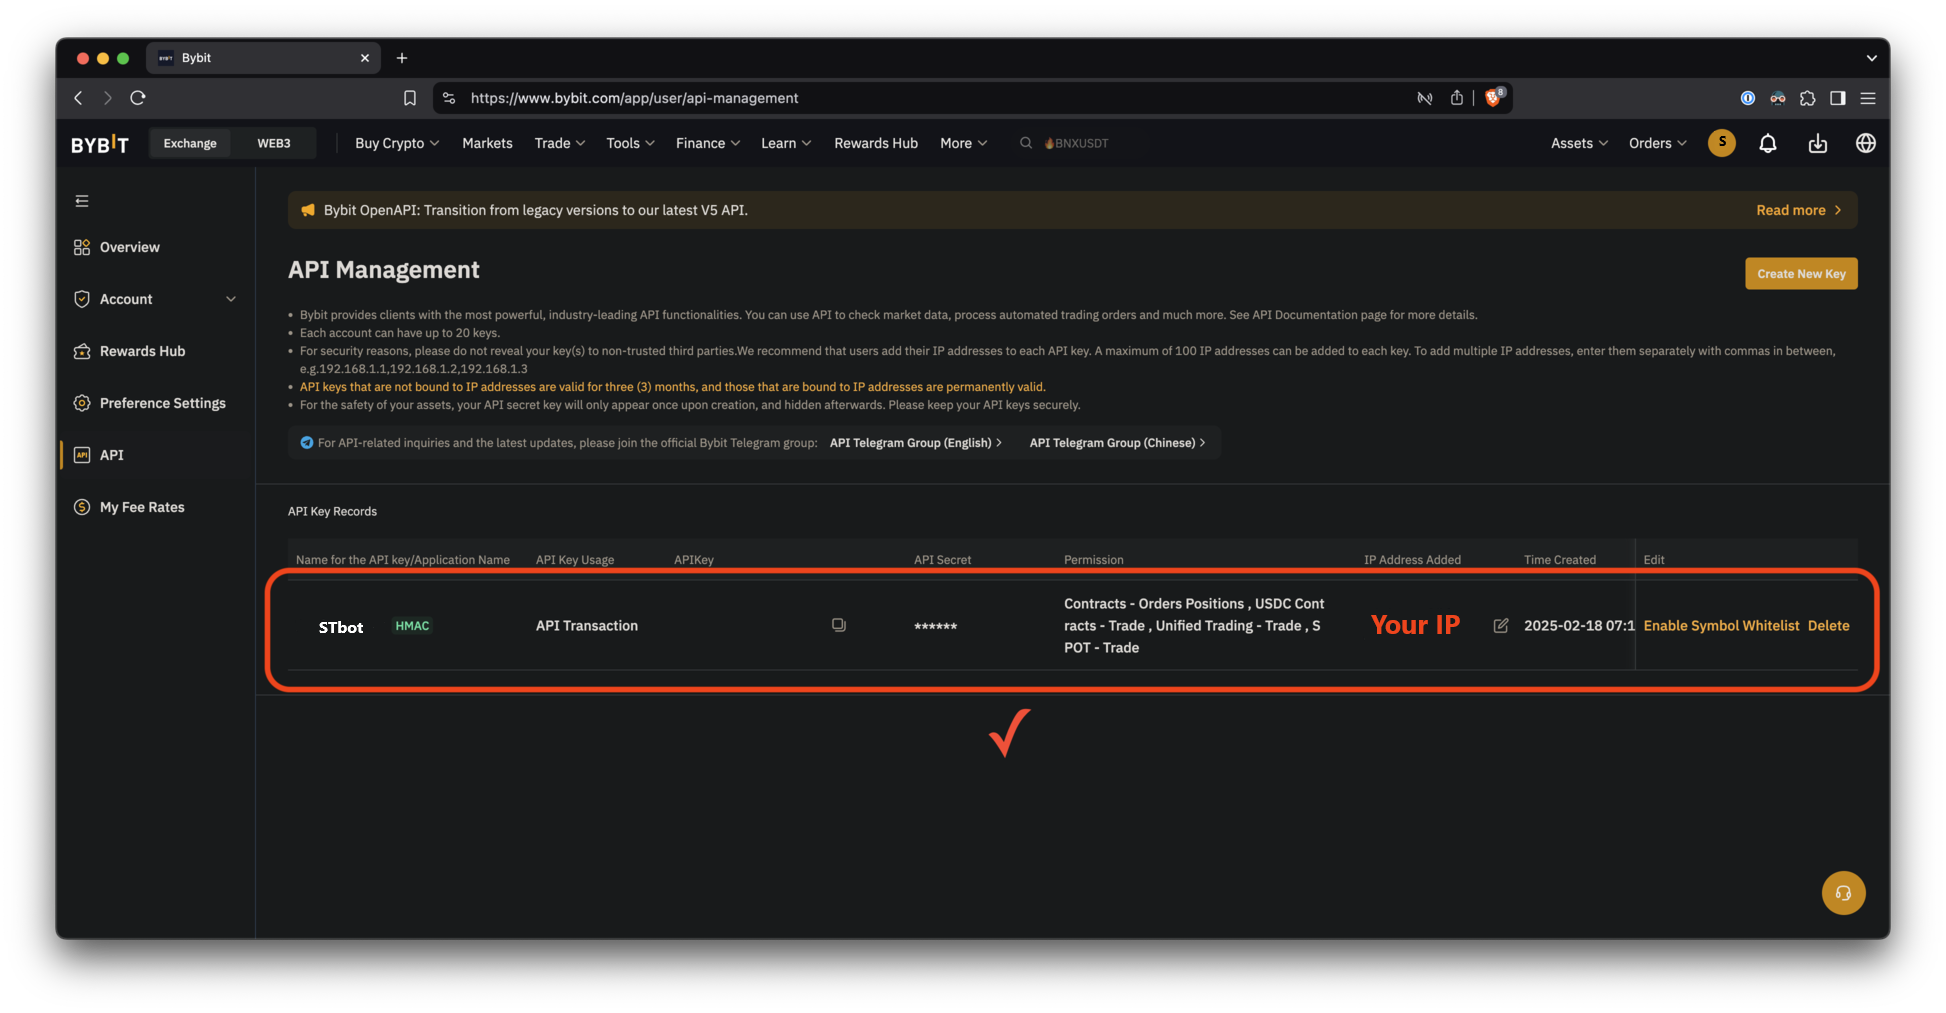
If you see a message like this, your API key was successfully created!
Done!
#hashtags
Recent Posts
You might be interested
Legal information
Legal status and nature of services. The company does not provide brokerage services, is not a professional participant in the securities market, and does not engage in asset management or investment consulting. The company provides software and technical infrastructure for automating trading based on user settings. The service does not accept or transfer client funds, does not store assets, and has no access to them; integration is carried out via API keys with no withdrawal rights.
Informational nature of materials. All information on the website and in the applications is for informational and educational purposes only and does not constitute individual investment advice, a public offer, or an inducement to trade.
Data and results. Examples of trades, monitoring data, backtesting results, and other information are provided to illustrate algorithm performance and do not constitute a statement or promise of profitability. Past results do not guarantee future performance; variations may occur due to market conditions, slippage, fees, and liquidity limitations.
Risks. Trading in financial instruments and crypto assets involves a high level of risk, including the risk of total capital loss, and may not be suitable for all investors. Before using algorithms on a live account, demo testing and independent risk assessment are strongly recommended.
Jurisdiction. References to Federal Law 'On the Securities Market' No. 39-FZ are provided for reference purposes only. Legal requirements may vary depending on your jurisdiction.